7 DIY Ways To Detect Water Leaks At Home
Water leaks can waste up to 10,000 gallons of water annually and cost you thousands in repairs. Early detection is key to saving water, avoiding costly damage, and reducing your bills. Use our comprehensive leak detection checklist alongside these 7 simple DIY methods to spot leaks in your home:
- Inspect plumbing fixtures: Check faucets, sinks, toilets, walls, and ceilings for drips, stains, or moisture.
- Use your water meter: Turn off all water sources and monitor the meter for changes.
- Test toilets with food coloring: Add dye to the tank and check the bowl for leaks after 20 minutes.
- Listen for unusual sounds: Dripping, hissing, or running water noises may indicate hidden leaks.
- Check appliances: Inspect washing machines, dishwashers, refrigerators, and water heaters for pooling water or damage.
- Test water pressure: Use a pressure gauge to detect drops that signal leaks.
- Monitor water bills: Look for sudden increases that don’t match your household’s water usage.
These quick checks can prevent major damage and save you money. However, if you detect persistent issues like musty odors, low water pressure, or hidden leaks, it's time to call a professional plumber. Our leak detection services use advanced technology like acoustic sensors and thermal imaging to find hidden leaks without damaging your property.
How to Find a Water Leak – American Leak Detection DIY tips
1. Check Plumbing Fixtures for Visible Leaks
Spotting leaks early can save water and prevent costly repairs. For example, a single dripping faucet can waste over 3,000 gallons of water annually, potentially adding 10% to your water bill.
Check Faucets, Sinks, and Toilets
Start with your faucets. Look for steady drips, water pooling around the base, mineral deposits, or rust. These are clear signs of a leak that’s been happening for a while.
Next, inspect your sinks and the area underneath. Warped wood, water stains, discoloration, or lingering moisture are red flags. Run your hand along the pipes under the sink to check for dampness.
For toilets, examine the base for pooling water or any wobbling when you push gently. Don’t forget to check the water supply lines behind the toilet – leaks here can often go unnoticed.
"A consistently dripping faucet can cause: Permanent mineral stains in your sink, Clogged and overflowing drains, Water leaking under your sink causing water stains on cabinetry or even water damage leaking through to floors or ceilings, Deteriorating grout and caulk, Landscaping or foundation issues caused by accumulating water due to an outdoor faucet leak." – Plumbing by Jake
Once you’ve inspected these fixtures, expand your search to less obvious areas like walls and ceilings.
Inspect Ceilings and Walls
Leaks often leave their mark on ceilings and walls before the source becomes visible. Focus on areas near plumbing fixtures like toilets, showers, and sinks. Look for water stains, discoloration, or bulging surfaces.
Pay attention to paint or wallpaper. Peeling, bubbling, or cracking could mean moisture is trapped behind the surface. Run your hand over walls and ceilings near plumbing to check for dampness.
A musty smell can also be a giveaway. These odors often appear before visible damage and suggest moisture has lingered long enough for mold to grow. Be extra cautious around areas where different materials meet – like where tiles meet drywall or fixtures attach to walls – as these spots are prone to leaks and hidden damage.
2. Use Your Water Meter to Find Leaks
Your water meter is one of the most effective tools for uncovering hidden leaks in your home. It measures water flow even when all your fixtures are turned off. Usually, you’ll find your water meter in a concrete box near the curb or sidewalk, positioned between your house and the street. These meters typically record water usage in cubic feet (one cubic foot equals 7.48 gallons). By monitoring your meter when no water should be running, you can easily detect leaks.
Step-by-Step Instructions
- Turn off all water sources. Make sure every faucet, appliance (like dishwashers and washing machines), sprinkler system, and outdoor spigot is completely off.
- Locate and open the water meter. If you have an electronic meter, look for a digital display. Navigate to the Flow Rate screen and observe the reading. Any flow displayed when everything is off likely signals a leak.
- For standard meters, check the leak indicator. This is usually a small colored triangle or asterisk that moves with even the smallest water flow. Watch it for a few minutes – any movement means water is flowing somewhere.
- Record the reading. Write down the meter reading, including any trailing zeros. For electronic meters, note the number displayed on the Current Total Volume screen.
- Wait 20–30 minutes. Leave all water sources off for at least this long (or up to an hour for smaller leaks) before rechecking the meter.
- Pinpoint the leak. Shut off your home’s main water supply and repeat the test. If the meter reading stops changing, the leak is inside your home. If it keeps advancing, the problem is likely between your house and the meter.
Interpreting Results
If your meter reading changes during the waiting period, you have a leak. The size of the change can help you estimate the severity of the issue. For example, a dripping faucet can waste up to 30 gallons daily (900 gallons a month). Bigger leaks can waste astonishing amounts of water: a 1/16-inch leak may lose about 970 gallons a day (29,100 gallons monthly), and a 1/8-inch leak can waste around 3,600 gallons daily (108,000 gallons monthly).
It’s worth noting that toilets are responsible for 75% of household leaks. If your meter test suggests an indoor leak, start by inspecting your toilets – many toilet leaks are completely silent.
For an extra layer of monitoring, check if your water company offers online account access. Reviewing your usage trends over time can help you spot unusual spikes that might indicate a problem.
3. Test Your Toilet with Food Coloring
Silent toilet leaks can waste a surprising amount of water and inflate your utility bill without you even noticing. These leaks occur quietly between the toilet tank and bowl, unlike the more obvious drips or running sounds. A simple food coloring test can help you spot these hidden problems before they get worse.
This method works by showing whether water is continuously flowing from the tank into the bowl when the toilet isn’t being flushed.
How to Perform the Test
All you need for this test is basic food coloring and about 20 minutes. Start by removing the toilet tank lid and placing it somewhere safe to avoid damage. Make sure the tank is full after the last flush before proceeding.
"To perform a toilet dye test, all you need to do is take the lid off the toilet tank and drop a few drops of dye into it. (Food coloring works well.)" – Mengning Heil
Add a few drops of dark food coloring – blue, green, or red works best – directly into the tank water. These colors are easy to detect in the bowl. While dye tablets are available, regular food coloring does the job just as well.
Wait for 15–25 minutes without flushing to give the colored water time to seep into the bowl if a leak exists. Afterward, check the bowl carefully. If you see any colored water, even a faint tint, it’s a sign of a leak.
Once you’ve confirmed a leak, it’s time to investigate what might be causing it.
Common Causes of Toilet Leaks
The most frequent culprit is a faulty flapper, the rubber seal at the bottom of the tank. Over time, flappers can warp, crack, or shift out of place, allowing water to leak into the bowl. In-tank toilet cleaners can also damage the rubber, speeding up wear and tear.
Sometimes, the issue lies with the alignment between the flapper and the flush valve. A stretched or broken chain connecting the flapper to the handle can prevent a proper seal. Mineral deposits or sediment buildup around the flush valve seat can also create tiny gaps that let water escape.
Another potential issue is the fill valve. Changes in water pressure or wear over time can cause the fill valve to stick open, leading to constant refilling and overflow into the bowl.
"Check if the food coloring reaches the bowl without flushing. If it does, that indicates a faulty flapper if you have one, or a defective gasket if you have a piston." – WCohn, Journeyman Plumber/Estimator
Most of these leaks are easy to fix with basic DIY repairs. Cleaning or replacing the flapper is often enough to resolve the problem. If cleaning doesn’t work, a new flapper typically costs less than $10 and can be installed in just a few minutes. For water-saving toilets, make sure to choose the correct flapper size and adjust it properly for the best performance.
Make it a habit to perform this test once a year to catch leaks early, save water, and lower your utility bills.
4. Listen for Drips and Running Water
Your ears can be a powerful tool for detecting hidden leaks in pipes, especially in places where visual inspections aren’t possible, like behind walls or under floors. The trick lies in distinguishing ordinary plumbing sounds from those that might indicate a problem.
Everyday sounds, like water splashing in the sink, the shower, or the brief rush of water when you flush the toilet, are normal. But if you hear dripping, hissing, or gurgling in unusual places, it could be a sign of a leak.
Best Times to Listen
The best times to listen for leaks are during the early morning or late at night when everything else is quiet. To improve your chances, turn off TVs, radios, and other noisy appliances. Ask household members to avoid using water during your inspection to eliminate distractions.
Once the environment is quiet, focus your attention on areas where leaks are most likely to occur.
Areas to Focus On
Start your inspection in locations where leaks are common. Pay close attention to:
- Around toilets
- Under sinks
- Near the water heater
- By washing machines and dishwashers
- Behind showers
- In the basement
Listen for running water or hissing sounds, particularly when no one is using water. If it’s recently rained, dripping sounds in walls could point to roof or wall penetrations that are letting water in.
If you hear hissing, bubbling, or the sound of rushing water when all faucets are turned off, it may indicate a continuous leak. Persistent humming or vibrations in your pipes, especially if your water pressure is above 50 PSI, can also signal a potential problem.
When you notice an unusual sound, try to locate its source. This will help you determine whether you can handle the repair yourself or if it’s time to call in a professional.
What Unusual Sounds Might Mean
Not all strange plumbing noises indicate a leak. For example:
- Banging or clanging sounds could be due to water hammer, which occurs when water flow is suddenly stopped.
- Gurgling may simply point to a clog or a ventilation issue.
- Ticking sounds that only happen when water is running might come from your water meter.
To confirm a leak, pair your listening efforts with other methods, like visual inspections or checking your water meter. Combining these techniques will help you verify the presence of a leak and pinpoint its exact location.
5. Check Appliances and Common Leak Areas
Household appliances can often be the culprits behind hidden water leaks. While it’s easy to focus on plumbing fixtures, taking the time to inspect your appliances can reveal leaks that might otherwise go unnoticed.
"Regularly checking your home appliances for water leaks is essential for the smooth management of your home. Even a small leak in one of your home appliances can cause serious damage to flooring, cabinets and walls. Mold and mildew formed by appliance water leaks can threaten the health of your household." – Sears Home Services
Unchecked appliance leaks not only waste water but can also lead to severe damage and costly repairs if ignored.
Appliances to Check
- Washing Machines
Examine hoses monthly for signs of wear, like bulges or cracks. Replace them every 3–5 years to avoid leaks. - Dishwashers
Inspect the water supply line, valves, and door seals annually. Clear out the cabinet beneath to catch early signs of trouble. - Refrigerators
For models with ice makers or water dispensers, check the water supply line and defrost drain pan for clogs once a year. - Water Heaters
Look for rust, corrosion, or moisture around the base during annual inspections. These are key indicators of potential leaks. - Air Conditioners
Check the condensate drain lines monthly for blockages and ensure the drip pan is free of standing water to prevent overflow.
Signs of Appliance Leaks
Be on the lookout for the following warning signs:
- Pooling water near appliance bases
- Water stains or discoloration on walls, floors, or cabinets
- Musty or moldy smells signaling hidden moisture
- Warped or softened flooring around appliances
- Peeling or bubbling paint on nearby walls
- Dripping or hissing sounds near appliances
- Unexpected spikes in your water bill or noticeable drops in water pressure
- Visible mold growth caused by prolonged dampness
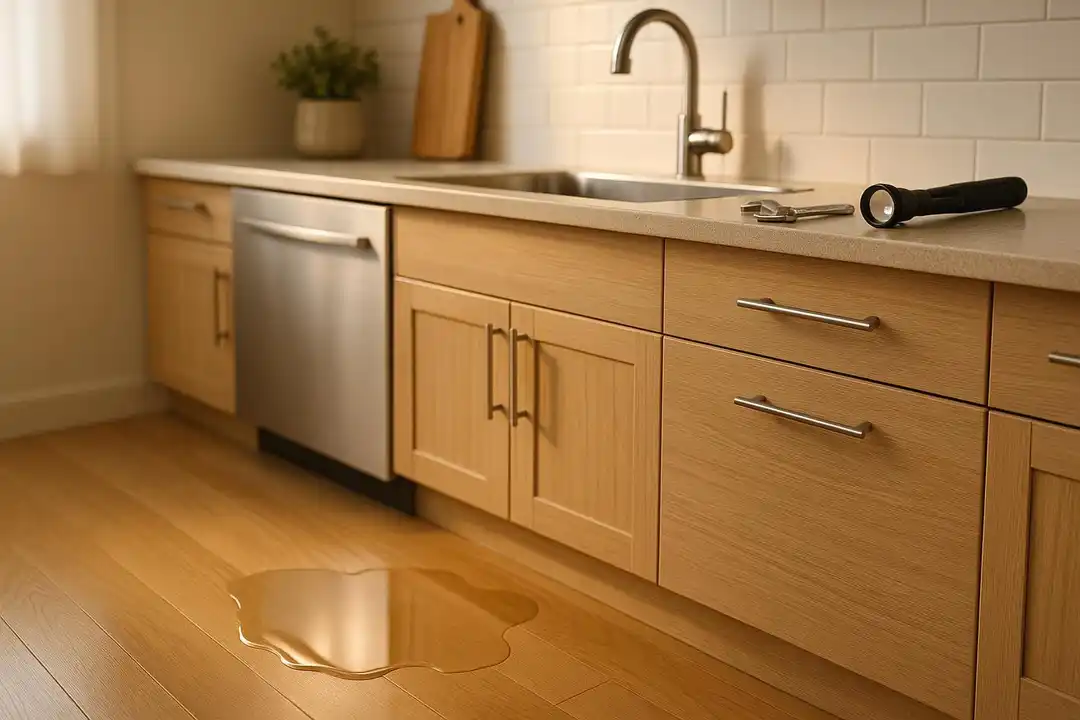
For hard-to-see areas, clear out cabinets and use a flashlight to thoroughly inspect connections and surrounding spaces.
6. Test Water Pressure to Find Leaks
Checking your home’s water pressure can uncover leaks that might otherwise go unnoticed. This method works by monitoring changes in pressure over time – if there’s a leak, water escapes, and the pressure gradually decreases.
"Pressure testing is essential to ensure the integrity of your plumbing system in your home or place of business." – Plano Plumbing & Leak Detection
Setting Up the Test
To get started, you’ll need a water pressure gauge. Begin by shutting off your main water supply. Then, open all faucets and flush toilets throughout your home to completely drain the water lines.
Next, attach the pressure gauge to an outdoor faucet or hose bib close to your main water supply. Wrap plumber’s tape around the threads to create a tight seal and prevent air leaks. If you’re performing an air pressure test, make sure all outlets are sealed except for the test connection and one for the air compressor.
For air pressure testing, connect an air compressor to your system and increase the pressure to 80–100 PSI. While typical residential water pressure ranges between 40 and 60 PSI, testing at higher pressure can make leaks more noticeable. Once the system is pressurized and sealed, monitor the gauge for any changes.
Analyzing Pressure Drops
Keep an eye on the gauge for at least 15 minutes, but ideally up to an hour. Look for any fluctuations or consistent drops in pressure.
If the pressure drops by more than 3 PSI within an hour, it’s a strong indicator of a leak in your plumbing system. Minor fluctuations of 1–2 PSI can occur due to temperature changes, but steady or significant pressure loss points to a problem.
If the pressure holds steady during the test, your plumbing system is likely in good shape. However, if you notice a consistent decline, it confirms the presence of a leak – even if it’s not immediately visible.
7. Watch Your Water Bills for Sudden Increases
Keeping an eye on your water bill isn’t just about budgeting – it’s also one of the easiest ways to uncover hidden leaks. A spike in your monthly bill can act as a red flag for leaks that are out of sight, like those behind walls or underground. Spotting these early can save you from costly repairs and water waste.
How to Track Usage
Start by reviewing your water bills from the past year. Look at them in order to identify any sudden, unexplained increases in usage. For example, if your household habits haven’t changed – no extra guests, no pool filling, no ramped-up lawn watering – but your bill has jumped, it’s worth investigating.
Another smart move is to compare your current bill with the same month last year. Water use naturally varies by season: summer bills often rise due to outdoor watering and extra showers, while winter usage tends to dip. Comparing year-over-year bills helps you separate normal seasonal changes from signs of a possible leak.
Also, check whether your bill is based on an actual meter reading or an estimate. Utility companies sometimes estimate your usage if they can’t access the meter, which can hide or delay the detection of leaks. If you see estimated readings, reach out to your utility provider and request an actual reading. And don’t forget to confirm that your water rates match local pricing – rate hikes can sometimes explain higher bills.
Once you’ve reviewed everything, focus on any sharp increases that go beyond typical seasonal patterns.
Key Indicators of a Leak
One of the clearest signs of a leak is an unexpected spike in your water bill compared to the same period in previous years, especially if your household’s water habits haven’t changed. Common culprits include leaky toilets, dripping faucets, or outdated fixtures that waste water without being obvious.
Toilet leaks, in particular, can waste hundreds of gallons of water daily. Hidden leaks, like those behind walls or underground, can silently drain water while potentially causing structural damage. According to the EPA’s WaterSense program, the average home wastes around 10,000 gallons of water annually due to leaks.
Here’s a breakdown of how much water different leak sizes can waste:
| Leak Size | Gallons Per Day | Gallons Per Month |
|---|---|---|
| Dripping leak | 15 gallons | 450 gallons |
| 1/32 in. leak | 264 gallons | 7,920 gallons |
| 1/16 in. leak | 943 gallons | 28,300 gallons |
| 1/8 in. leak | 3,806 gallons | 114,200 gallons |
| 1/4 in. leak | 15,226 gallons | 456,800 gallons |
| 1/2 in. leak | 60,900 gallons | 1,827,000 gallons |
Toilets alone account for nearly 30% of a home’s indoor water use, which is why even a small toilet leak can hit your wallet hard. Outdoor leaks can be just as costly – a single broken sprinkler head can waste 25 gallons in just 10 minutes.
If you have access to smart water monitoring systems, use them. These tools provide real-time data and can alert you to unusual water use patterns, helping you catch leaks within hours instead of waiting for your next bill.
When to Call a Professional Plumber
DIY leak detection can be a great first step, but some situations demand the expertise of a professional. Knowing when to bring in a plumber can save you from expensive repairs and potential property damage.
Signs You Need a Plumber
There are clear warning signs that point to hidden leaks requiring professional attention. A persistent musty odor, visible mold or mildew, peeling paint or wallpaper, and low water pressure are all red flags. You might also hear water running when all faucets are off – this is especially concerning in homes with slab foundations. Outdoors, a soggy yard during dry weather could indicate an underground leak that needs immediate expert evaluation to prevent further damage.
"Professional plumbers can use specialized equipment to locate and identify leaks accurately, allowing for targeted repairs and prevention of further damage."
– Reliance Plumbing Sewer & Drainage, Inc.
If DIY efforts reveal an ongoing issue, these signs mean it’s time to call a pro. While DIY methods can be helpful, they lack the precision of professional tools, which boast an accuracy rate of around 90%. Professional intervention is often necessary, and here’s what you might expect in terms of costs:
| Detection Method | Typical Cost Range |
|---|---|
| Under-slab leak detection | $100–$700 |
| Wall and ceiling leak detection | $100–$1,000 |
| Basement leak detection | $100–$2,500 |
| Video camera inspection | $150–$500 |
| Thermographic imaging | $300–$500 |
| Smoke testing | $250–$300 |
"Though slab leak detection can be pricey, it’s not a DIY project – pros use specialized equipment to pinpoint the source of leaks."
– Yelp
Why Choose Hernandez Plumbing
When leaks are hard to find or require advanced solutions, Hernandez Plumbing steps in with over 50 years of experience. Serving Miami, FL, since 1972, this family-owned, third-generation company specializes in locating tricky leaks and providing efficient plumbing repairs. Their non-invasive techniques are designed to minimize property damage, and they collaborate with expert leak detection companies to deliver detailed plumbing reports for accurate repairs.
"We’ve partnered up with an expert leak-detection company that does that part in the least invasive way, they provide us with a plumbing report so we do the repair in the most efficient way possible. You have access to the report as well."
– Alex D., Business Owner
Hernandez Plumbing also offers 24/7 emergency services, recognizing that leaks don’t follow a schedule. Their upfront pricing includes a $49 residential plumbing diagnostic (regularly $97), and they back their work with a 100% satisfaction guarantee.
Customers frequently praise the company’s professionalism and reliability. In November 2024, Whitney Wills commended Jorge for his punctuality, clear communication, and efficient service. That same month, Veronica Calvo highlighted their thorough explanations during a water heater repair.
For older homes or properties in areas prone to ground movement, Hernandez Plumbing advises annual plumbing inspections to catch potential problems early. If you suspect a leak but can’t locate it, reach out to Hernandez Plumbing to prevent further damage and escalating water bills.
Conclusion
Taking a hands-on approach to leak detection can protect both your home and your finances. These seven DIY methods equip you with simple yet effective tools to identify and address water issues before they escalate. Catching leaks early is essential – especially when water damage claims in the U.S. exceed $13 billion annually.
"Early detection and repair of water leaks offer significant benefits that can save property owners from costly repairs and potential health hazards." – American Discount Plumbing
By routinely inspecting plumbing fixtures, monitoring your water meter, testing toilets with food coloring, listening for unusual sounds, checking appliances, measuring water pressure, and keeping an eye on your water bills, you’re taking meaningful steps to prevent expensive repairs.
Prevention is always easier – and cheaper – than fixing major damage. These straightforward techniques can help you identify issues while they’re still manageable, safeguarding your property and your family’s comfort.
"Detecting leaks early prevents minor issues from becoming expensive emergencies, ultimately protecting your home and your wallet." – Splash Plumbing
However, some situations call for professional help. If you notice persistent high water bills, damp floors, the sound of running water when fixtures are off, or unpleasant odors, it’s time to call in the experts. Hernandez Plumbing, serving Miami since 1972, offers 24/7 emergency services and over 50 years of experience to help address these problems before they worsen.
Start inspecting your home today using these methods to stay ahead of potential damage and avoid costly repairs.
FAQs
How can I tell if my higher water bill is caused by a leak or an increase in water rates?
If you’ve noticed your water bill climbing unexpectedly, the first step is to check your water meter. Turn off all faucets, appliances, and outdoor water sources. If the meter is still running or shows any movement, there’s a good chance you’re dealing with a leak.
Another way to investigate is by comparing your water usage to previous months. A sudden jump in usage without any changes in your household routines often signals a leak. On the other hand, if your water usage hasn’t increased but your bill has, it might be due to a rise in local water rates.
If you suspect a leak but can’t pinpoint where it’s coming from, it’s a good idea to call in a professional plumber, such as Hernandez Plumbing, for expert leak detection services.
What are the common signs of a hidden water leak in your home?
Hidden water leaks can wreak havoc if not addressed promptly. Here are some key signs that might indicate a hidden leak in your home:
- A sudden spike in your water bill without any increase in water usage.
- Persistent musty odors that suggest mold or mildew may be present.
- Visible water stains or discoloration on walls, ceilings, or floors.
- Warped or bubbling surfaces, like peeling paint or wallpaper.
- Unexplained wet spots or damp areas on carpets or floors.
- The sound of running water when no taps or appliances are in use.
Spotting these signs early can save you from costly repairs down the road. If you suspect a leak, don’t wait – Hernandez Plumbing provides expert leak detection services in Miami, FL. With 24/7 emergency support and upfront pricing, they’re ready to help protect your home and your peace of mind.
When should I call a professional plumber instead of trying DIY leak detection?
If you’re dealing with a hidden leak, a hard-to-find issue, or if your DIY attempts haven’t worked, it’s time to call in a professional plumber. These experts have the right tools and the know-how to quickly locate and repair leaks, helping to reduce the risk of further damage to your home.
Other red flags that warrant a plumber’s immediate attention include a sudden jump in your water bill, lingering mold or mildew, or water stains on your walls or ceilings. Addressing these problems promptly can save you money, time, and prevent bigger headaches down the line.
Need Professional Help?
Our licensed plumbers are ready to help with your leak detection needs.