DIY Plumbing Tools: Ultimate Guide
Plumbing problems can strike when you least expect them, but having the right tools can save you time, money, and stress. This guide covers the must-have tools for common home plumbing repairs and when to call a professional. For serious issues like pipe repair or leak detection, professional expertise is essential.
Key Takeaways
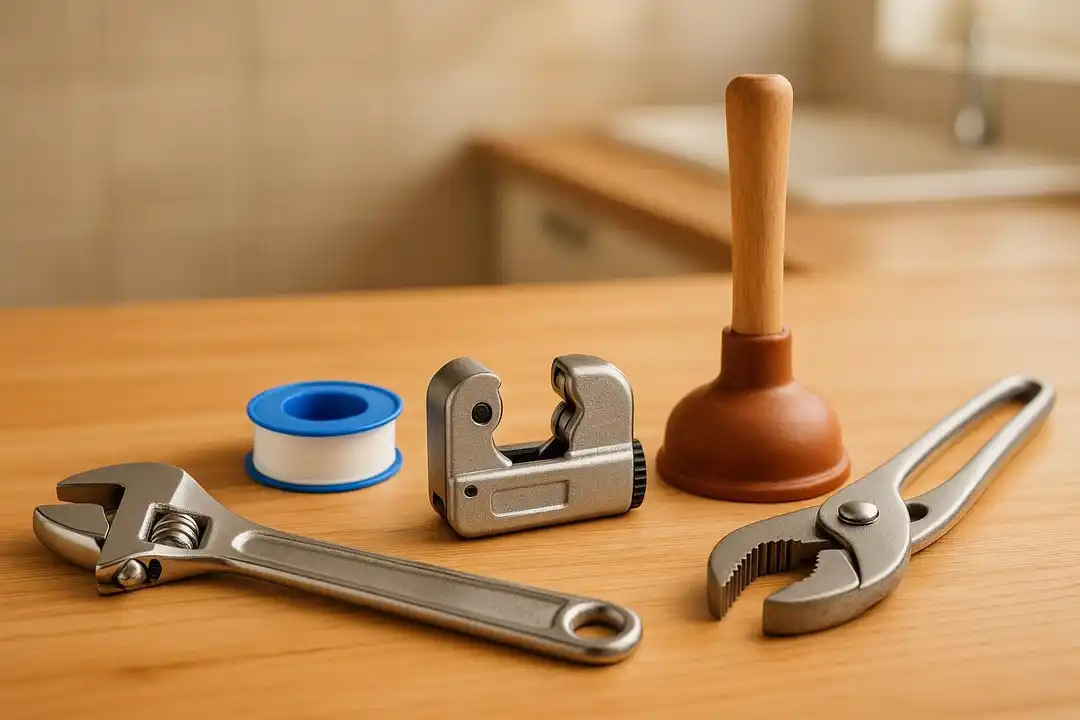
- Basic Tools You Need: Pipe wrench, basin wrench, adjustable wrench, tongue-and-groove pliers, and a plunger.
- Advanced Tools for Complex Jobs: Hacksaw, tubing cutters, hand auger, plumber’s torch, and deburring tool.
- Safety First: Use goggles, gloves, and heat shields to avoid injuries.
- Tool Maintenance: Clean, dry, and oil tools to extend their lifespan.
- Know Your Limits: Call a professional for gas leaks, sewer backups, or major repairs. Learn more about emergency plumbing services for urgent situations.
Quick Tip
DIY plumbing can handle minor issues like clogs or leaky faucets, but serious problems require expert help to avoid costly damage. For emergencies, professionals like Hernandez Plumbing are available 24/7.
Let’s dive into the tools and tips to make plumbing repairs easier and safer.
21 Must Have Plumbing Tools Every DIY Homeowner Needs
Basic Hand Tools for DIY Plumbing
Starting your plumbing toolkit? There are five must-have hand tools that every DIY plumber should own. Choosing durable, high-quality tools will save you time and money in the long run.
Here’s a closer look at each tool, its purpose, and some practical tips for using them effectively.
Pipe Wrench
The pipe wrench is the backbone of any plumbing toolkit. In fact, 85% of plumbers consider it an essential tool. It’s designed to grip and turn pipes, especially when dealing with rusted or stuck fittings. Using two pipe wrenches – one to stabilize the pipe and the other to turn the fitting – provides the leverage needed for tough jobs.
A good pipe wrench typically costs between $15 and $30. Look for models made from hardened steel alloys for durability and consider cushioned handles if you plan to use them frequently.
"If I can’t trust my tools, I can’t do my job properly." – Randy Mitchell, commercial service manager
Pro tip: Wrap pipes or fixtures with an old rag before using a pipe wrench to avoid scratches and protect finishes.
Basin Wrench
Tight spaces under sinks can be tricky to navigate, but a basin wrench makes the job much easier. This tool is specifically designed for reaching behind sinks to loosen or tighten faucet nuts.
The basin wrench’s pivoting jaw and long handle make it perfect for faucet installations and repairs. You can even flip the jaw to work in either direction, saving time and effort. In fact, using a basin wrench can cut faucet installation time by up to 30%. At just $10–$20, it’s a budget-friendly addition to your toolkit.
To use it, fit the jaw securely onto the nut, then apply steady pressure while turning. The long handle provides the leverage you need, even in cramped spaces.
Adjustable Wrench
The adjustable wrench is a versatile tool that works with various nut and bolt sizes, making it ideal for tasks like installing faucets, replacing showerheads, or connecting supply lines. Unlike fixed-size wrenches, it adapts to different fittings, offering flexibility for a range of plumbing tasks.
Whether you’re working with copper, PVC, or PEX fittings, an adjustable wrench is up to the task. Prices range from $10 to $40, and it’s worth investing in a model with smooth adjustment mechanisms and comfortable grips for better usability.
Tongue and Groove Pliers
Also known as channel-lock pliers, these are a go-to tool for gripping, tightening, and loosening smaller nuts and bolts. Their adjustable jaw positions and long handles provide excellent leverage, making them especially useful for supply line connections, compression fittings, and smaller pipework.
For added protection, use covers to avoid scratching fixtures. Opt for pliers with cushioned handles and multiple jaw positions to handle a variety of tasks with ease.
Plunger
No home plumbing kit is complete without a plunger. However, not all plungers are the same. Knowing the difference can make a big impact on how effectively you deal with clogs.
- Cup plungers are best for sinks and bathtubs.
- Flange plungers are designed for toilets, as the flange creates a better seal in the drain opening.
To get the best results, ensure there’s enough water to fully cover the plunger’s head. A reliable plunger costs between $10 and $30 and can clear most clogs without needing harsh chemicals or professional help.
When selecting tools, keep this advice in mind:
"The best tools are the ones that fit the job you are doing, fit in your hand, fit the workspace available, can be used in a comfortable work position, and reduce the force you need to apply." – California Occupational Safety and Health Administration, the National Institute for Occupational Safety and Health, and the Centers for Disease Control and Prevention
With these five tools, you’ll be equipped to handle most basic plumbing repairs at home. For more complex tasks, specialized tools and techniques might be necessary.
Advanced Tools for Complex Plumbing Repairs
Once you’ve mastered the basics, advanced tools step in to handle more intricate plumbing challenges with precision. These tools are indispensable for tackling complex repairs that go beyond the reach of standard hand tools. While they may require a higher upfront cost, their accuracy and efficiency can save you time and frustration.
Hacksaw
A hacksaw is your go-to tool for cutting through metal pipes, bolts, and screws. To ensure clean, precise cuts, make sure the blade is secured tightly in the frame. Mark your cut line clearly, and use steady, even strokes to let the blade do the work without jamming or breaking. You can find a quality hacksaw for $15 to $30.
Tubing Cutters
For clean, straight cuts on copper, PVC, or PEX pipes, tubing cutters are unbeatable. These tools work by clamping onto the pipe, tightening until the cutting wheel makes contact, and then gradually rotating to create a smooth, even cut. This precision ensures secure, leak-free connections. Tubing cutters typically cost between $10 and $40.
Hand Auger (Drain Snake)
When plungers fail to clear a stubborn clog, a hand auger – or drain snake – comes to the rescue. This flexible, coiled wire tool is designed to reach deep blockages.
"A drain snake solves this by pushing a flexible, coiled wire through the pipe until it reaches the clog. As you turn the crank, the corkscrew tip either breaks the clog apart or grabs onto it so you can pull it out." – Marie Abendroth, Author / Home Improvement Pro
Always wear rubber gloves and safety goggles while using a hand auger, and avoid chemical drain cleaners during the process. Work slowly and with controlled pressure to avoid snapping the wire, which could lead to injury. Hand augers are available for $20 to $40.
Plumber’s Torch
Soldering copper pipes requires a steady and controlled heat source, and that’s where a plumber’s torch comes in. Before you start, inspect the area for fire hazards, use a heat shield to protect flammable materials, and keep a fire extinguisher nearby. Proper ventilation is crucial – open a window and use a small fan to disperse fumes.
"The solder and propane torch are both hot enough to instantly burn flesh. So, here’s a fast, easy primer on how to do it safely." – 1-Tom-Plumber
Safety is key when using a plumber’s torch. Wear protective gear like goggles, long sleeves, and gloves, and wash your hands thoroughly after handling flux and solder. Remember, propane torches can produce carbon monoxide, so avoid confined spaces without proper ventilation. A reliable plumber’s torch costs around $20 to $40.
Deburring Tool
After cutting pipes, rough edges and burrs can interfere with secure fittings. A deburring tool smooths out these imperfections, ensuring proper connections. It can also clean the inside of threaded pipes by removing sharp edges. At just $10 to $20, a deburring tool is a small but essential addition to your plumbing arsenal.
These advanced tools can turn even the most daunting plumbing repairs into manageable tasks. While the initial investment may be higher, the precision and reliability they offer often mean the difference between a successful DIY project and needing to call in a professional.
Safety Equipment and Tool Care
Plumbing repairs come with their fair share of risks – flying debris, chemical splashes, and hot surfaces are just a few examples. Using the right safety gear and keeping your tools in good condition can help prevent injuries and protect your equipment for the long haul.
Goggles and Gloves
When working with cutting, sawing, or power tools, impact-resistant goggles should be your go-to safety measure. Did you know that eye injuries account for up to 10% of all home improvement-related injuries? Many of these could be avoided simply by wearing proper eye protection. Goggles also shield your eyes from potentially harmful chemical splashes when working with solvents, adhesives, or cleaning agents.
For your hands, choose chemical-resistant gloves when dealing with harsh cleaning products, flux, or solder. If you’re handling sharp-edged tools or metal pipes, opt for cut-resistant gloves instead. According to the Consumer Product Safety Commission, hand tools are linked to over 40,000 injuries annually. This highlights how crucial proper hand protection is. Make sure your goggles and gloves fit well, and inspect them regularly. Replace any gear showing signs of wear or damage to ensure continued safety.
Once you’re geared up, shift your focus to maintaining your tools. Proper care not only ensures safety but also extends the lifespan of your equipment.
Tool Maintenance
After each use, clean your tools thoroughly. Wipe them down, rinse off any residue, and dry them completely. For metal tools, a light application of machine oil can help prevent rust. Tools exposed to water or chemicals need extra attention – make sure they’re fully dry before storing them, as moisture can accelerate corrosion.
Regular inspections are key. Look for signs of wear, rust, or damage, and sharpen cutting tools like hacksaws and tubing cutters when they start to dull. Adjustable tools should be checked for loose screws or bolts, and moving parts like plier joints or wrench mechanisms benefit from a few drops of oil to keep them functioning smoothly. Store your tools in a cool, dry environment. Using a toolbox with moisture-absorbing packets or a wall-mounted pegboard can help reduce humidity and keep everything organized.
Maintaining your tools isn’t just about extending their life – it also reduces risks, especially when working on high-temperature tasks.
When to Use Heat Shields
Heat shields are a must-have for soldering work near flammable materials. These protective barriers, made from fire-resistant materials like fiberglass or metal, help prevent accidental ignition or heat damage to nearby surfaces. Whether you’re working near wood framing, drywall, or insulation, a heat shield can protect against scorching or discoloration, saving you from costly repairs.
Heat shields are designed to handle high temperatures and can be reused, making them a smart investment for soldering projects. Always position the shield between your torch flame and any combustible surfaces, and let the pipe cool completely before removing it.
Professional plumbers, like those at (tel:305-428-3782), make safety a top priority. They rely on proper protective gear and follow strict routines for cleaning, inspecting, and storing their tools. By adopting these same practices, you can work safely and keep your tools in excellent condition for years to come. Taking these precautions ensures your DIY plumbing projects are both effective and low-risk.
Tool Comparison: Pros and Cons of Key Plumbing Tools
Picking the right plumbing tools can turn a tricky repair into a manageable task. Each tool is designed for specific purposes, helping you build a toolkit that fits your needs and budget.
| Tool | Primary Uses | Advantages | Disadvantages |
|---|---|---|---|
| Pipe Wrench | Gripping and turning threaded pipes and fittings | Hardened serrated teeth provide strong grip; available in sizes from 6 to 48+ inches | – |
| Basin Wrench | Tightening or loosening nuts on faucets and supply lines in tight spaces | Perfect for working in confined areas under sinks | – |
| Adjustable Wrench | Various sizes of nuts and bolts | Adaptable to different fastener sizes | – |
| Cup Plunger | Unclogging sinks, tubs, and showers | Great for flat drain surfaces | – |
| Flange Plunger | Unclogging toilets | Specifically designed to fit toilet bowl shapes | – |
Let’s take a closer look at how these tools can impact your DIY plumbing projects.
The pipe wrench is a must-have for gripping and turning threaded pipes. Its hardened, serrated teeth provide a firm hold, even on stubborn fittings. Fun fact: this tool was invented by Daniel C. Stillson, who patented it on October 12, 1869.
For tight spaces under sinks, the basin wrench is your go-to tool. Its design allows you to reach and tighten faucet nuts that standard wrenches simply can’t handle.
If you need a versatile tool for different fastener sizes, the adjustable wrench is ideal. It eliminates the need for multiple fixed-size wrenches, making it a space-saving option for your toolkit.
When it comes to plungers, the cup plunger is effective for clearing clogs in flat surfaces like sinks and tubs. On the other hand, the flange plunger is specifically shaped to tackle toilet clogs with ease.
When to Call a Professional
While DIY plumbing tools can handle many common fixes, some situations require professional expertise to prevent costly mistakes and property damage.
Plumbing failures in the U.S. result in significant property losses, with the average claim exceeding $10,000, according to the Insurance Information Institute (2023). Knowing when to call in a professional is essential.
Signs You Shouldn’t Ignore
Certain plumbing issues go beyond what basic tools can fix. For instance, persistent leaks that defy your efforts with wrenches or sealants often point to underlying problems. Other warning signs include water stains spreading on walls or ceilings, mold forming near fixtures, and sewage odors – all of which require immediate professional attention.
If you notice sudden drops in water pressure, gurgling noises in multiple drains, or visible pipe corrosion, these could indicate larger issues like damaged main water lines or sewer connections. Diagnosing and resolving these problems often requires specialized tools and expertise.
High-Risk Plumbing Problems
Some plumbing issues pose serious risks to your health and safety. Gas leaks, sewer backups, and water heater malfunctions are prime examples. Without the right tools or training, attempting to fix these can lead to gas poisoning, electrical hazards, or contamination.
Major pipe bursts and flooding demand swift professional action to prevent structural damage. Sewer line repairs might involve tools like inspection cameras or industrial-grade augers, while water heater fixes often deal with dangerous gas or electrical connections. In these cases, professional intervention isn’t just helpful – it’s essential.
Common DIY Pitfalls
A 2023 HomeAdvisor survey found that nearly 30% of homeowners who tried DIY plumbing repairs eventually had to call a professional to finish or fix the job. Common mistakes include overtightening fittings (leading to cracks), using chemical drain cleaners that damage pipes, and improperly installing water heaters, which can cause leaks or electrical hazards.
DIY attempts to clear sewer line clogs can backfire, creating messy backups that require professional cleanup. These errors often turn simple fixes into costly renovations, making professional help a smarter choice from the start.
Knowing When to Call for Help
If your tools aren’t solving the problem, it’s time to call a professional. Recurring clogs, hidden water leaks, or repairs you’re unsure about handling safely are all signs that expert help is needed. This shift from DIY to professional plumbing can save time, money, and frustration.
In many cities, including Miami, FL, building codes require permits and inspections for significant plumbing work, like water heater installations or sewer line replacements. Licensed plumbers ensure compliance with these regulations, helping you avoid fines or legal issues.
Why Professionals Make a Difference
When DIY efforts fall short, professionals bring tools and skills that homeowners can’t replicate. Licensed plumbers use advanced equipment like inspection cameras and electronic leak detectors to quickly pinpoint hidden problems. These tools allow them to resolve issues in hours that might take you days of trial and error.
For example, Hernandez Plumbing offers 24/7 emergency services, upfront pricing, and a satisfaction guarantee. Their licensed technicians handle everything from leak detection to cast iron pipe replacement. While emergency plumbing services typically cost $150 to $500+ per visit, this investment can prevent much more expensive damage later.
The Financial Upside of Hiring a Pro
Although professional plumbing services may seem pricey upfront, they often save money by preventing water damage, mold growth, and repeated repairs. Plus, licensed plumbers are insured, which protects you from liability if something goes wrong during the repair process.
When you call a plumber, you can expect a clear diagnosis, an explanation of the problem, and an upfront estimate. To make the process smoother, clear the work area, provide access to affected fixtures, and share details about the symptoms you’ve noticed. A transparent and customer-focused approach ensures the experience is as stress-free as possible.
Recognizing the limits of DIY plumbing isn’t just about convenience – it’s about protecting your home, your family, and your finances. Sometimes, calling a professional is the smartest move you can make.
Conclusion
Having the right tools at your disposal can make all the difference when it comes to tackling plumbing issues quickly and avoiding costly emergencies. Basics like pipe wrenches, basin wrenches, adjustable wrenches, tongue-and-groove pliers, and plungers are must-haves in any homeowner’s toolkit. These essentials can handle most common plumbing problems with ease.
When building your toolkit, focus on quality over quantity. Durable tools not only perform better but also reduce the risk of injuries and the need for frequent replacements. For an investment of around $30–$100, a DIY toolkit can save you hundreds of dollars that would otherwise go toward professional service calls.
To keep your tools in top condition, clean them regularly, apply lubrication as needed, and store them properly. Always use safety gear and follow the manufacturer’s instructions to avoid accidents. Taking care of your tools ensures they work when you need them and helps you recognize when a job is beyond your capabilities.
DIY tools are great for routine tasks, but there are times when calling a professional is the smarter choice. For example, issues like water line replacements, persistent leaks, or anything involving gas lines or major water heater repairs should be left to experts – especially if local building codes are involved.
When DIY isn’t enough, companies like Hernandez Plumbing provide 24/7 emergency services with upfront pricing and a satisfaction guarantee. Their licensed technicians bring the expertise and specialized equipment needed to handle complex problems safely and efficiently, often saving you from even bigger expenses down the line.
FAQs
What are the most common mistakes to avoid when using DIY plumbing tools?
When diving into DIY plumbing projects, steering clear of common pitfalls can spare you a lot of hassle – and money. To start, always shut off the water supply before beginning any repairs. Skipping this crucial step could result in unwanted water damage and expensive cleanups.
Another common misstep is using improper tools or trying to improvise with the wrong equipment. This can not only complicate the repair but also harm your plumbing system. Similarly, be cautious about over-tightening connections – it might seem like a good idea, but it can actually crack fittings or porcelain fixtures, leading to leaks or even flooding.
Lastly, think twice before reaching for chemical drain cleaners. While they might seem like a quick fix, these products can corrode your pipes and make clogs worse in the long run. Instead, stick to safer options like a plunger or a drain snake for clearing blockages. With the right preparation and tools, your DIY plumbing projects can go much more smoothly!
How do I know when a plumbing problem is too complicated for DIY fixes and needs a professional?
Some plumbing problems are simply too complex for DIY fixes and need the attention of a professional. Look out for warning signs like persistent clogs, leaks that keep coming back, discolored or bad-smelling water, water stains or bubbling paint on your walls, or unusually high water bills. These can often signal serious issues, such as damaged pipes, sewer line troubles, or failures in your water system.
If you’re feeling uncertain or the issue gets worse despite your efforts, reaching out to a licensed plumber is the smart move. For those in Miami, FL, Hernandez Plumbing provides expert solutions for even the toughest plumbing challenges, offering transparent pricing and 24/7 emergency services.
What safety measures should I follow when using advanced plumbing tools like a plumber’s torch?
Using tools like a plumber’s torch demands extra caution to keep yourself safe. Start by checking the torch for any signs of damage, leaks, or loose connections. Ensure all fittings are tight and secure before turning it on. To protect yourself, always wear flame-resistant clothing, gloves, and safety goggles – these are essential for guarding against sparks and flying debris.
Work in a well-ventilated space to avoid breathing in harmful fumes, and keep your area tidy to minimize fire hazards. Never use gas cylinders that are damaged, and store them in a cool, safe place, away from any heat sources. Most importantly, stick to the manufacturer’s instructions for using and maintaining the torch. With these safety measures in place, you can tackle your plumbing projects with confidence and peace of mind.
Need Professional Help?
Our licensed plumbers are ready to help with your repiping services needs.